Table of Contents
*This post may contain affiliate links. As an Amazon Associate we earn from qualifying purchases.
Try a bit of DIY.
Many jobs around the house need to be done. Some need to be done on a daily basis, others every once in a while.
Picking up a new home project can be fun. Swapping your bathroom linoleum for tile can be a gratifying, inexpensive task – especially if you do it yourself.
Let’s take a look at how to grout tile yourself.
Different Types of Grout for Grouting Tile
First, let’s look at the different types of grout you could use on this project.
There are four main types of grout:
- Cement-Based Grout: Cement-based grout is the most common commercial type and used in most DIY tile projects. While it’s not as strong as epoxy grout, it’s easier to work with.
- Epoxy Grout: This type of grout is more expensive than its commercial counterparts. However, this is because it’s stronger and has a high degree of water resistance. This makes it ideal for use with bathroom tiles.
- Latex Sand Cemented Grout: This grout is similar to cement-based grout. However, it is made with a few additional features that make it slightly different. These include an added degree of resistance to water. It also features bonding characteristics, making it an ideal grout for use in both bathroom and kitchen settings.
- Caulking Grout: Caulking grout can be used alongside other types of grout, as it has a slightly different job to do. Caulking grout is typically squeezed by hand from a tube or a caulking gun and applied to surfaces that are hard to reach, like corners.
Now that you know the different types of grout, let’s take a look at how to use them to grout tile.
How to Grout Tile
Before you start grouting, you’ll want to clean the joints and apply tape on the edges of the tiles.
Next, you’ll want to mix the grout powder with water until the powder is completely dissolved. Move the bucket around as you mix and use a trowel to achieve this task.
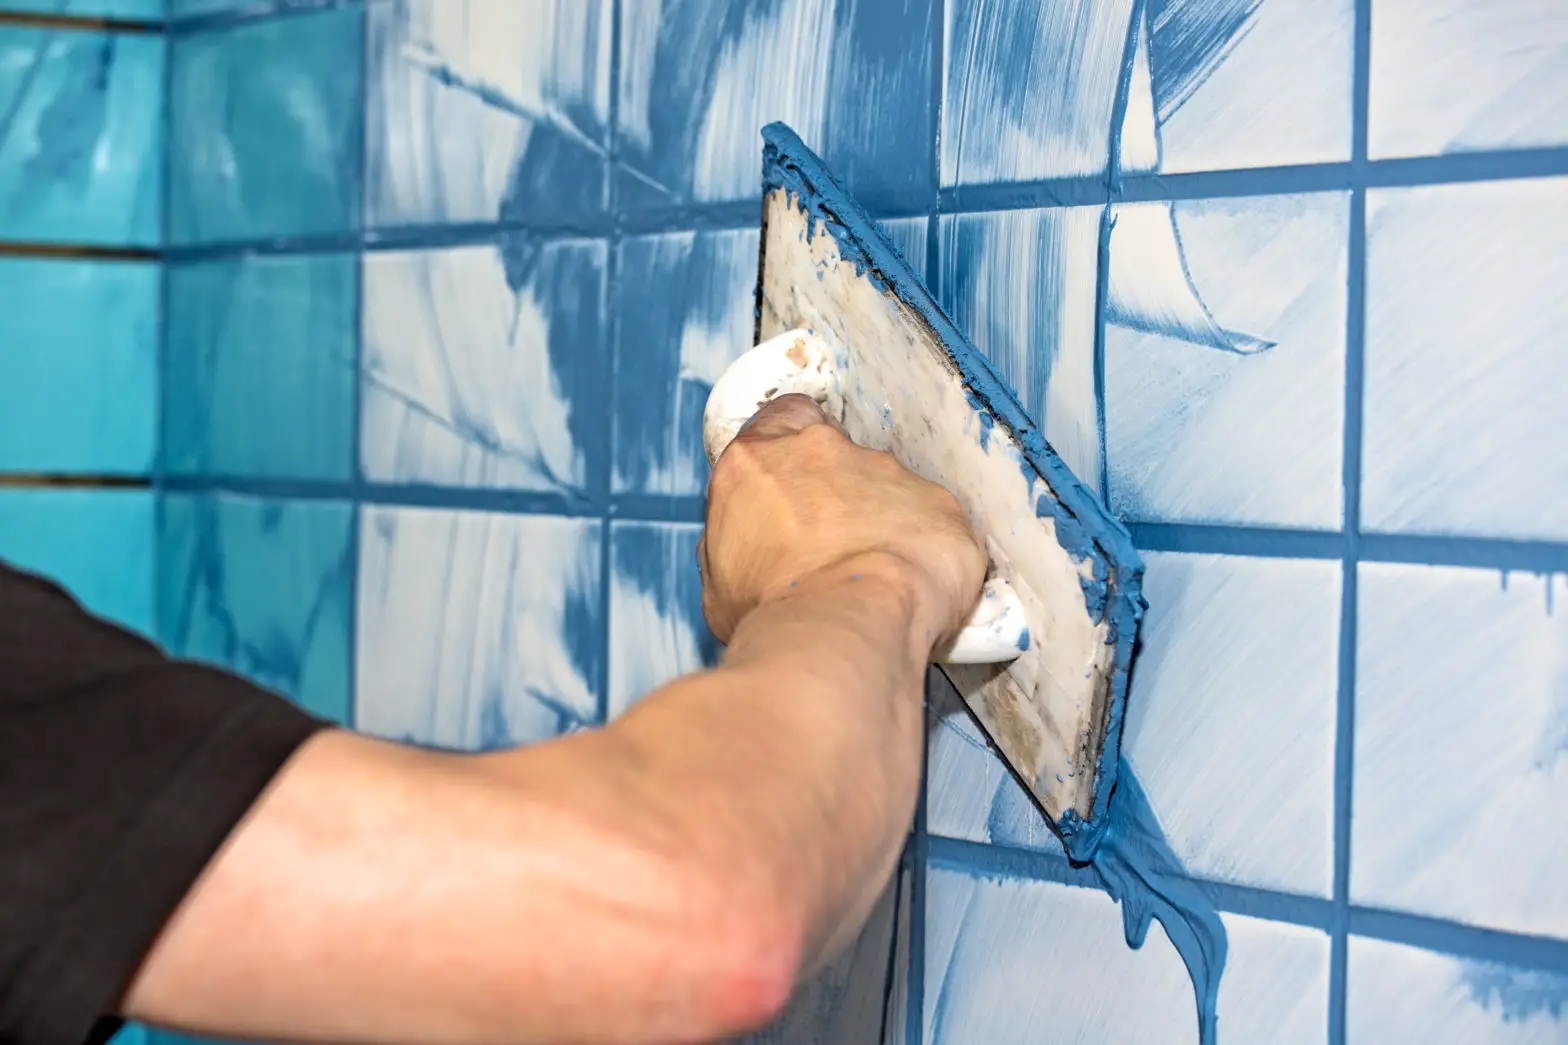
Once this step is complete, get your grout float and load it with grout from the bucket. The float is a flat piece of plastic with a handle that is ideal for applying grout onto your work surface.
Drag the grout along the edge of the bucket before loading it onto the float.
Spread the grout evenly over the tiles so that it can set deeply into the joints. Remove any excess grout by wiping across the tiles with a squeegee.
Once you’ve removed any excess grout, use a damp sponge to sponge off the surface of your tiles. Rinse out your sponge and reapply it in a sweeping motion until you’ve eradicated the rest of the grout.
After the film of grout has been left to dry, you can buff your tiles with a cloth. This will remove any grout you missed with the sponge.
Lastly, caulk the inside corners. This will give it a nice finish.
Important Things to Remember When Grouting Tile
Now that you know how to grout tile properly, let’s look at the do’s and don’ts when it comes to this type of DIY project.
Do remember to clean everything before you start. Also, repair any cracks that may soak up unnecessary grout. Don’t spread too much grout at once. If you do, it may harden before you’ve finished, and if it’s allowed to build up, it can be quite difficult to scrape off.
Do let the grout slak. This means that once you’ve mixed it in the bucket, let it sit for 10 minutes or so. This will help you assess whether it’s too thick or too thin. If it’s too thick, add a little bit more water.
Don’t scrub too hard. This can make the tiles dirtier, and you won’t get much cleaning done. Also, make sure that the grout is set before you attempt to remove any excess product.
Do force it into the joints. While your initial applications might appear to be getting into all the fissures, what you’re seeing might be superficial. When wiping the excess grout, remember to press down into the joints with your sponge.
Learning How to Grout Tile
Setting your bathroom tiles is essential.
While you might not be an expert in tile-laying, grouting tile is easier than you think. It calls for a few, simple pieces of equipment and if you’re proactive, the job can be done within a day.
Remember to make sure you’ve got everything you need, and don’t forget to wipe your tiles properly, so that you do a thorough job.
You’ll have beautiful, water-proof bathroom tiles in no time.